Saturday, July 3, 2010

What makes THIS a green building project? PART 1 - Materials and Recycling

Now that I've discussed my approach to green design and construction, let me explain how I'm applying it to our remodel. I'll try to stay as consistent to the framework I used in the last post as possible.

Material Selection

First of all, since this is a remodel, a lot of my materials are already here in the house. The idea is not to tear out things that don't need tearing out. That, of course, must be balanced out with the fact that some things are old, ugly, or just don't go with the design. I'll go through some of the main materials and items that will be brought in.

Paint - Paint is one of the major sources of poor indoor air quality. Long after the smell goes away, it can still be off-gassing toxic substances into your home. The majority of our paint will be Yolo Colorhouse. This product went beyond simply eliminating VOC's and earned Green Seal GS 11 2008 certification. Green Seal is a very trusted and stringent certification program. I also plan to do some accent walls with American Clay, a plaster made of all natural aggregates, clays, and pigments. Much of the product comprised post-industrial aggregate waste from rock quarries and sea shells.


American Clay Wall Plaster


Cabinets - After some consideration, we've decided that our current kitchen cabinets aren't going to work in our design. These ones will be taken out and reused in my tool room. We haven't decided on the replacements yet, but the main thing will be to ensure that the wood was sourced responsibly. The Forest Stewardship Council has made it very easy to do this. We're also going to check out Dean Innovations, which is where I have been getting our garden soil, compost, and gravel. They make flooring, cabinets, and dimensional lumber from local fir trees that have fallen over due to natural causes; windstorms, landslides, old age, etc.

Counters - As I mentioned a few posts back, we are using Paper Stone for our kitchen counters and the bar. This material is made of 100% post-consumer, FSC certified, recycled paper. The paper is held together with a non-toxic resin and homogenized using heat and pressure. The resulting product is an impervious surface that is certified food safe by the NSF. The counters are closer to the durability of real stone than wood, but can be sanded, cut, and edged using normal wood working tools.


Paper Stone Countertops


Floors - The original living room floor will be refinished. Unfortunately, the kitchen floors are starting to look like a lost cause and the rest of the house is just plywood subfloor at the moment. The kitchen will most likely get tile, but we haven't started to research our options on that yet. The bedrooms will be getting wood floors. These aren't picked out yet, but we will be sure that they are FSC certified and/or salvaged and that the adhesives and finishes don't contain any harmful substances. Although there are some better carpeting options on the market these days, we still don't plan on having any in the house. If you've ever ripped carpet out, you probably feel the same way.

Interior Walls - Most of our interior walls will stay in tact with nothing more than a fresh coat of paint (someone really beat this house with an ugly stick before we moved in). The bathrooms are getting gutted and the new walls will be a Magnesium Oxide panel, or MgO Board. One available here locally is GreenE-Board, but I haven't done a lot of research on them in particular. The advantage of this product over conventional drywall is that it has a much lower embodied energy, better fire rating, and is mold and moisture resistant. It makes much more sense, especially for bathrooms, and can even be used on the floors as tile backer.

Roof - I will be replacing the existing asphalt roof with a standing seam metal roof. While metal has a high embodied energy, the benefits are numerous. It doesn't leech chemicals into the rainwater, it lasts a lifetime, it will never leak if installed correctly, and it can be recycled if and when it's ever removed. We were planning on doing this soon, but there is quite a project that goes along with it fixing the roof framing, upgrading insulation, and replacing the ceiling. This will have to wait until next year.


Standing seam metal roof, Not my favorite color


Siding - We haven't picked out our exact siding yet, but we are researching options and weighing out the benefits. Fiber-cement products, such as Hardie, are very affordable and make many sustainability claims. I do agree with some of their points. These products are durable, hold paint longer than wood, and don't rot or get eaten by pests. One of their downsides is being very resource-intensive in production. Another reason that we haven't decided yet is that I wanted to use a salvaged cedar siding with a natural weathered look and Annie prefers painted siding. This one remains to be settled...

Windows - We haven't picked an exact window manufacturer yet, but we will definitely be going with a non-vinyl option. Why not vinyl? Read about the horrors of PVC here. The main options left would be fiberglass, wood, and aluminum (or a combination of those). There are some great modern aluminum frame options available now with advanced frame design to eliminate thermal bridging through the frame. Windows are also available with a variety of options concerning U-Factor (insulation) and Low-E (solar ray deflection). This is something I'll go into greater detail about in a later post.

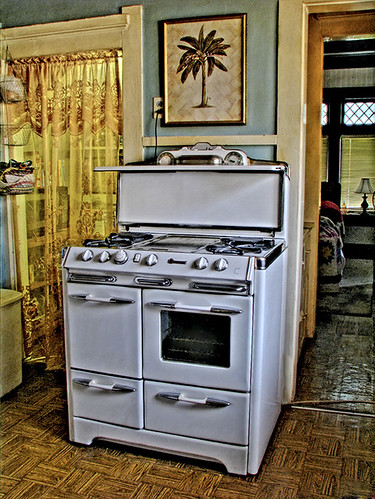
Stove - We can't buy all vintage appliances, but I'm sure glad we found this beautiful mid-century O'Keefe and Merrit. That's one less item that had to be manufactured overseas and shipped here. Plus just can't get this look anymore unless you plan on dropping $4,000+ on a reproduction.


Annie finally got the stove she always wanted


Recycling

I've been making an effort to reuse everything possible so far. This isn't something that can always be planned for ahead of time, so I'm keeping organized piles of materials as I pull them out and taking from them when I can. For example, I was able to replace the rotten/beetle eaten subfloor using 2x4's I pulled out of a wall I tore down. Things I know we won't use are being taken to proper recycling or reuse facilities as they stack up. The tubs, sinks, mirrors, etc from the bathrooms will all go to The ReBuilding Center.


This stuff all got sorted and a lot of the lumber is being reused on site. Most of the remaining unusable debris will get reused off-site or recycled. Very little, if any, will end up at the dump.


As you can see, a lot of though and research must go into these plans. Various trusted certification labels are starting to be seen on products more and more, which help tremendously in determining if it's right for a green building project. A great resource for me has been EcoHaus, Portland's premier green building supply store. They are very careful about what goes on their shelves and the staff is extremely friendly, knowledgable, and non-pretentious.

So far, we feel very successful in working toward our goal of choosing products that have a low impact on the environment on their way to us, do not negatively affect air quality or health, are made to last a long time, and can be reused or recycled at the end of their useful life here.

Stay tuned for PART 2, where I will discuss the plan for resource efficiency and conservation.

Friday, July 2, 2010

What makes a green building project?

The title of this entry was going to be "What makes THIS a green building project"?, but before I can answer that, there is a lot of ground to cover.


I feel like there is a lot of confusion surrounding green building and sustainability in general. This is partially because these have become buzz words and marketing tools in our society (see: Greenwash) and the true definition is easily lost or forgotten. 


Some greenwashing is less obvious than others. I bought some Fresh Aire Choice primer for our floors because it has no VOC's. It still smelled horrible like most paint. When I looked closer, I realized that it still carried the Prop 65 cancer warning label because it is still full of horrible toxins. 


The best place to start is the dictionary definition of the word "sustainable":


"...2 a : of, relating to, or being a method of harvesting or using a resource so that the resource is not depleted or permanently damaged..."


The simple conclusion is that this definition applies to the resources used to construct and the resources consumed by the building and it's occupants. I also think it's safe to say that when the term is used in building, it implies sustaining human life and livelihood as well as keeping our environment in tact. Using toxic building products is working against sustaining life in the small scale and short term as it is causing health problems for occupants. Irresponsible sourcing and manufacturing of resources is doing the same thing in the large scale and long term as it is destroying our eco system, threatening the very thing that sustains life on this planet. 


When taking all of this into consideration, you may begin to question the use of the word "sustainable". Are today's "green" construction practices really sustainable in every sense? In my opinion, they probably aren't in most cases, but I believe we are taking strides in the right direction.


With that out of the way, here is my approach to building green and working toward a sustainable future, broken down into three categories: Material Selection, Resource Efficiency, and Education & Behavior. A more complex breakdown would include advanced design and construction methods, but for now, they are scattered throughout these categories. 


Material Selection


The materials we choose to build with play a major role. We can no longer grab something off a shelf without considering these factors:
  1. Where did it come from and how was it sourced? Was it mined in a way that destroys an eco system or gives laborers health problems?
  2. Did it take copious amounts of energy to produce and transport to you? This is known as "embodied energy" and is most commonly referred to when discussing hybrid cars. There are many arguments that the embodied energy of a hybrid will never be offset by the efficient consumption and lower emissions of the car while it's on the road.
  3. Is it healthy for the building's occupants? We all know that lead paint and asbestos are no good, but most people aren't informed that their new carpets may be off-gassing toxins or that they are breathing formaldehyde used in the glue in their cabinets.
  4. If it's an appliance or fixture, does it have an acceptable efficiency rating? (More on this below)
  5. How durable is it? What is it's lifespan and where will it end up when it's done serving it's purpose in your building? 

These granite countertops may be durable and recyclable, but consider the other factors. They take extremely high amounts of energy to mine, cut, and polish. They very well may have been mined in Africa and processed in China before being shipped over here.

I'll use #5 to segway into further consideration on this point that needs it's own attention; Recycling. This is how I break down recycling in green building in order of most to least desirable methods:
  • On-site reuse. You really can't ask for a better product than one that can be reused with little or no effort. In a remodel, everything you avoid tearing out is great. Other things may need more effort. I recall seeing a house where the old roof was milled down into flooring.
  • Off-site reuse. Architectural salvage is one of the greatest things available in the building industry. If a remodel or even a tear down is done properly, the unwanted items and materials can easily be sold or donated to a salvage center, reused on another of your projects, sold on Craigslist, etc.
  • Traditional recycling. Think of the glass bottles you leave in the curb for pickup. In most countries, these are refilled and reused. In the good old US of A, we take the often unnecessary extra step of grinding them down, melting them, and forming new glass or using the grounds for reflective paint. Consequently, the materials obtain more embodied energy through transportation and processing. This method isn't as ideal as simple reuse, but it is sometimes the only option and it makes for some very cool building products. 

These floors will look brand new again with very little effort compared to replacing them. 

There is a concept called "Cradle to Cradle" that everyone should be aware of. This is the idea that at the end of it's useful life, a material will have a new purpose rather than ending up in a landfill. This is one of the most difficult goals to achieve because it means thinking, and caring, about what will happen to this material way in the future. 


EcoRock earned Cradle to Cradle Gold Certification by MBDC. 

Consensus: Materials need to be as healthy as possible for the environment, humans, and animals from the time they are sourced, through production and transportation, through their useful life, and into their next purpose. Where applicable, they need to be resource efficient. 

Resource Efficiency


Having discussed the effect that material selection has on resources, the next consideration is the efficient use of consumable resources. While this could entail a large number of things, the main resources break down into are water and energy. Although I believe water to be an equal issue, the focus in our country right now is energy. This can be looked at in a variety of different ways, but I like to break it down into three steps:
  1. The first and most important step is to use passive design to reduce the energy load or demand. Passive design typically refers to elements that are fixed and require no human or technological intervention, thus leaving no room for error. Sizing roof overhangs to shade the house in the summer and allow the sun to heat it in the winter is a great example. Proper insulation and air sealing is another.
  2. The next step then would be active design. The most common example would be the use of solar panels to convert the sun's rays into electricity or to heat water. (The probably with renewable energy systems is that they can be cost prohibitive - a good place to start would be switching to renewable energy through your utility company if they offer it) Another good example of active desgin is a heat recovery ventilator. This is a unit that uses a heat exchanger to recover as much heat as it can from stale air as it leaves the house and uses it to pre-heat fresh air before entering your furnace.
  3. The final step is to choose efficient fixtures, appliances, and systems. This is very easy and effective if the first two steps are properly followed. There is a wealth of knowledge online and most items are labeled with some sort of efficiency guide comparing them to other units on the market. 

This passive solar design will work without any human or computer messing with it. 

Now on to water. Most people don't see this as being a big issue, but it really is. We are depleting our reservoirs and underground aquifers (check this site out for more info) and allowing stormwater runoff to pollute clean water supplies (source: EPA). Therefore, a sustainable building project should properly deal with the following:
  1. Potable water conservation. The first step in designing for conservation is to use highly efficient plumbing fixtures and appliances. In the last few years alone, toilets have come to use way less water per flush than they used to. A more commonly overlooked step is designing the hot water system to run the shortest possible distance from tank to fixture and properly insulate the pipes. We waste a lot of water waiting for it to get hot. There are some systems available now that run a loop back to the hot water tank and keep the water from coming through until it's properly heated.

  2. Exterior water conservation. Minimizing exterior water demand makes a big difference and can be done by Xeriscaping. Eliminating grass and other "thirsty" plants, while using as many native plants as possible, will drastically reduce, or even eliminate the need to water outdoors.

  3. Stormwater management. Every time it rains, the average property retains very little of the water. Most of it runs off the roof, concrete, etc and into the city storm drains. On it's way to the drains, it often picks up toxins and bacteria that pollute our clean water. The easiest solution is to disconnect gutters from the stormwater system and make sure roof runoff is staying on your property. An existing driveway is tricky to deal with, but there are plenty of solutions for new installations such as paver stones or pervious concrete. There are exceptions where it is unlawful to capture stormwater, some with good reason, some without. Check with your local building code or water bureau.

  4. Water collection and reuse. So your stormwater is all draining into your property now? Why not collect some of it in rain barrels or a big tank so you can water with it during the summer? I've even toured some homes that collect enough water for their landscaping as well as personal use, but the cost of setting up collection and filtration on that scale is still prohibitive in most cases. If local building codes allow for it, grey water is an excellent way to irrigate. Water can be collected from your shower, sinks, and washing machine for outdoor use. This requires very careful selection of soaps, cleaning agents, shampoos, etc. 
Consensus: Green building projects need to start with a passive design customized for local climate and projected building use. If the budget allows, on-site renewable energy and water harvesting systems should be used. In most cases, stormwater should be kept from running off-site. Once the lower demand for resources has been established, pick out highly efficient fixtures and appliances.

Education & Behavior


Here is where we, as a country, have continued to fail since the beginning. You can build the most eco-friendly, energy efficient building, and still end up with negative results due to human behavior. If a person is going to leave lights on all day, leave doors open in the winter, or wash their car every day, they need to be educated on the consequences. 


In the LEED for Homes reference guide, the smallest, yet one of the most important chapters deals with education. It's required of builders applying for LEED certification to write a user's manual for the house and to do an in-depth walkthrough with the buyer. Additional points are given if the builder chooses to use the project for public outreach and education. 
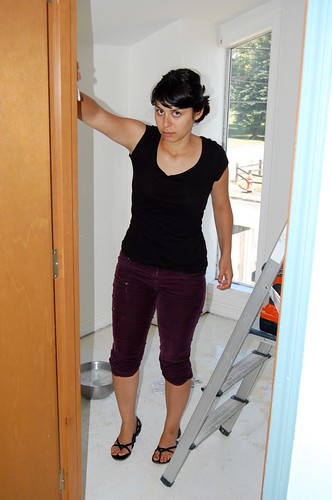


Keep it up, buddy!


Consensus: No amount of design, proper planning, technology, or advanced building methods will really make the difference. It's up to everyone to be educated and be and educator. The politics surrounding sustainability will probably always continue to interfere with mass public education and we really have to take matters into our own hands. 

Wednesday, June 30, 2010

Structural changes and a stud finder that actually works

We're finally back on track for the kitchen expansion after dealing with the rotten wood and Powder Post Beetle issues. Here's a quick review of the structural changes:
  • Open up the wall between the bathroom and kitchen (done). 
  • Reinforce the opening with a 4" x 6" header beam (done). 
  • Build the new bathroom wall about 30" back. This makes space for the fridge and a pantry (done). 
  • Cut out part of the bedroom to build a hallway and a closet. The hallway will have doors into the bedroom and bathroom. 
  • Open up the wall between the kitchen and living room (done). 
  • Reinforce the opening with a 4" x 6" header beam. 

This makes a nice open space between the kitchen and living room along with a bar facing the living room side. Moving the fridge really opens the kitchen up and moving the bathroom entry away from the kitchen is a huge plus. 


Off to the Rebuilding Center with some stuff to donate. I was careful not to damage things when I removed them so that they could be used again. 


What a great place. They have just about anything you could imagine and it's all priced very reasonably.  Lately it seems like prices of salvaged materials have gone through the roof and it's nice to have a place that doesn't operate like that. 


I built the wall in two sections so that it would go through the door. This also allowed me to carefully measure the opening it was going in and account for it being out of square. It was much easier to wiggle  the two pieces in separately. 


Bam!


Ok... On to the stud finder. I've had a number of these things over the years. Some of them came free with another tool, some of them I purchased. None of them really worked. I've seen some that make claims to greatness online selling for $100 or more, which sounded like too much, but I was almost ready to try one. I decided to give the Zircon i320 OneStep a shot. It was $40 and I'm very happy with it. 


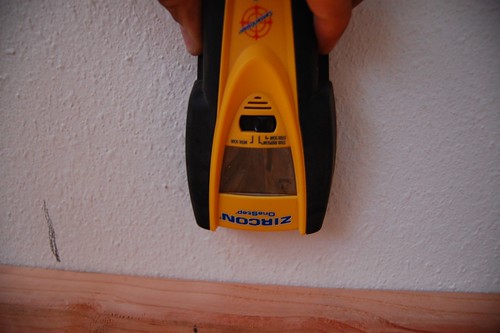
Scan started.


The bars on the screen show when you start across a stud edge. 


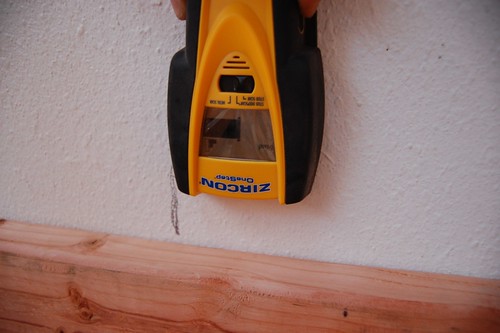
The bars and the red light indicate exact stud center. 


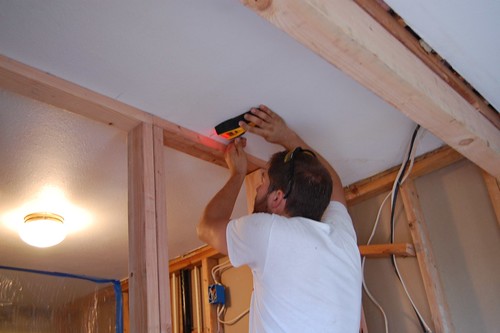
Reenactment.


It also has a deep scan mode for finding studs on the exterior, metal stud mode, and a warning if you scan over any wiring in the wall. 


*Insert stud finder joke here*

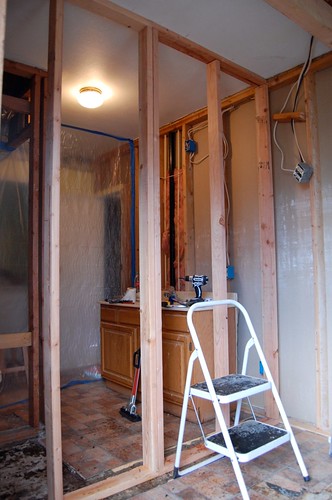
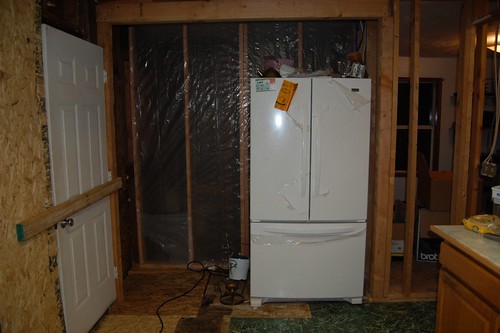
Back to the kitchen. I sheeted the new wall with 6 mil plastic and taped the edges so that I can work on the bathroom without the dust or odor getting into the kitchen. I moved the fridge to it's new home and the kitchen suddenly seemed twice as big. Now we're waiting for the stove to be delivered. 


Notice my state of the art locking mechanism on the door. I lock our shed up at night by parking in front of the doors. Some day we'll have nice things...


Future home of a big open space. 


Things are coming together nicely now after that last setback. Today, Chance and I are going to finish the concrete form for the back deck and fill it with the gravel base. Annie and I also decided that we're going to wait on the metal roof until next year, so we're going ahead with the solar panel installation as soon as the installer is ready. 

Tuesday, June 29, 2010

Shipping containers

So I've been obsessing about building something with shipping containers lately.

For those of you unfamiliar with containers, here is a basic rundown:


  • Containers are cheap and easy to come by. They hit a point where it makes more sense for an importer to buy a new one with their cargo coming from overseas than to rehab the old one and send it back empty. 
  • Containers are very sturdy, so your structural design is already done for you. 
  • They can be stacked in almost any way imaginable. Think of them as giant Legos for adults. (I think that's why I like them so much)
  • Doors and windows can easily be cut in with a cutting torch or wheel. 
  • They don't have any insulation, so you have to get creative, especially if you want to maintain the container look. 
  • Typical external dimensions are 8' 6" H, 8' W, and 20' or 40' L.
  • Typical internal dimensions are 7' 8" H, 7' 6" W, and 19' 2" or 39' 1" L. 

I have a few ideas for something on our own property, which I'll try to put into Sketchup and post later on. In the meantime, here are a few of my favorite shipping container projects:


Container City

A Google search will come up with tons of results, including design and construction companies, architects, blogs, and photo galleries.

I like almost everything I've seen, but there are some projects that simply use the containers for their structural value and not for design. To each his own, and if it saves money, go for it, but I personally think that it defeats a lot of the purpose if you don't incorporate the container's existing look into the design. 


Sunday, June 27, 2010

The Final(ish) Plans

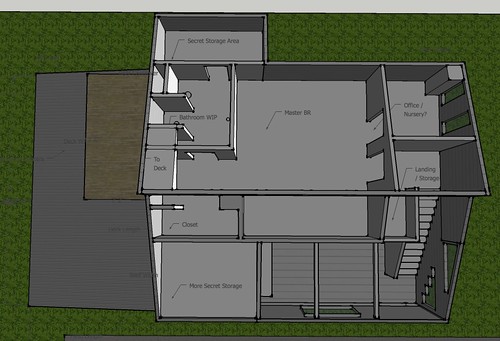
Well, it's been quite a process since the first time I measured the house out and modeled it in Sketchup. We've been through about four major designs and I have over ten models saved with at least small differences between them. The plans are now mostly finalized. I say mostly because the changes that will occur from now on will probably be based on decisions we make when we come closer to physically working on them. I've just been told by so many experienced people to plan as much as possible ahead of time, so here it goes:


Bird's eye view of the property. We don't have much planned in the way of landscaping yet, but the garden that you see on the left side is already there, as is the shed. It's a very special shed that I'll talk about later in this post. 


I just recently got Podium, a rendering plugin for Google Sketchup. I'm not very good with it yet and I really don't know why it cut off half of our fig tree, but I'll figure it out soon. 


The main change you'll see here is that the front door will be moved to the actual front of the house. Some of the odd shaped windows on that side will probably be replaced with ones that can open and the south side of the house will get another window or two. 


Rather than doing that expensive and unneeded addition, we're pouring a 12' x 21' patio outback and giving it a good, solid cover. It may rain a lot here, but it as long as you're dry, it's rarely too cold to cook and entertain outside. The upstairs deck will get rebuilt slightly bigger than it was. 


These labels are hard to read so I'll break down the floor plan:

First Story:
  • Entry (top right). Moved to where the old gas furnace was. Storage area under stairs may be used for HVAC equipment. 
  • Living Room (bottom right). Stays the same size, but the wall between it and the kitchen is almost completely opened up and a bar is put in. 
  • Kitchen (bottom left). The main difference here is that we're stealing space from the bathroom to create a nook for the fridge and some additional storage. 
  • Bathroom (top left). Entry is now from the adjacent hallway which will be created. Still a full bath, but going to standing shower only because of decreased space. 
  • Laundry Room (above bathroom). This is where the solar panel equipment will be mounted to the walls and it may have to house some of the HVAC equipment if it won't go under the stairs. 
  • Bedroom (top middle). Slightly smaller because of the new hallway. If the bedroom and bathroom doors can go more toward the front of the hallway, the back of it will be converted into closet space for the bedroom. Otherwise, we'll have to cut into the entry way. 

Second Story is pretty much unchanged for now. The only thing different about this model is that I squared off the triangle shaped piece of floor near the top of the stairs so it could be a closet. 

I feel like most of the work I'm doing and these plans for structural changes are basically bringing the house to more of a blank slate. As we approach that mark, we'll be getting more into the selection of finish products, colors, etc. Some of those things have already been discussed, decided on, or even started. Each of them will have their own post, but here is a run down of what I know so far:

Garden - This is built and planted. Right now we have about 300 SF, but we may add more later. We picked up a big variety of organic plant starts at Portland Nursery and some excellent organic soil and top dressing from Dean Innovations. 

Water Shed - This is the shed I mentioned early that sits in the far back corner of the property. I'll be going into great detail about this in another post, but it's essentially a self-contained rainwater harvesting building. The roof is designed to catch enough water to fill a 3,200 gallon tank during the rainy season, which is enough to water our garden during the rainy season. I'm involved with the creation, sales, and marketing of this product and this is our very first one. More info can be found at watersheddesigns.com.

Solar Array - The solar array pictured is a 2 KW Photovoltaic (provides electricity) set and a 2 KW Solar Thermal (heats water) set. I'll go into more detail later on about how the electric panels are tied into the power grid and how the hot water panels are tied into the heating system. 

Roof - We aren't sure about the color, but I'll be putting on a standing seam metal roof before we can mount the solar panels. 

Insulation - I haven't had a chance to study the roof / ceiling assembly yet, but I'll need to find a way to add more insulation. As for the walls, it looks like we'll be using 2" x 2" battens on the outside to increase the wall depth. We have some options at that point for insulation, but we'll probably leave the existing 4" alone and just add 2" of rigid foam board in between the battens. This, of course, will be done after ripping off the old siding, but we have yet to pick out a new siding material. 
Kitchen - We really wanted to keep the look of the kitchen warm and classic. We're painting and reusing the lower cabinets and replacing the counters with Paper Stone. The upper cabinets will be replaced with open shelving. We're going to try to refinish the old wood floors if they're salvageable. Appliances will all be white. We have the fridge already and we just bought a vintage gas stove that looks sort of like this:


Annie is very excited about the stove and we're both really looking forward to having a functional kitchen again. 

HVAC System - This is still up in the air, but what we want to put in is a forced air (ducted) system which is heated by a hydronic air handler. The hydronic air handler uses hot water running through a copper coil to heat the home's air, rather than a gas flame. Whatever system we use, a Heat Recover Ventilator will be added to the mix. These units recover 80% or more of the heat from the stale exhaust air and add it back into the fresh air entering the house. That takes a huge load off the furnace. 

Finally, we decided not to pursue LEED certification on this project. I'm still following the steps that I would have for certification, but it would have made the project more complicated and expensive. There are some great resources available to verify that a house has been brought up to proper energy standards, including the Energy Performance Score from Earth Advantage. This is a very simple and effective approach to energy auditing and reporting. There will even be a place for the score on the MLS listing if we ever sell the house.


Saturday, June 26, 2010

The Bugs

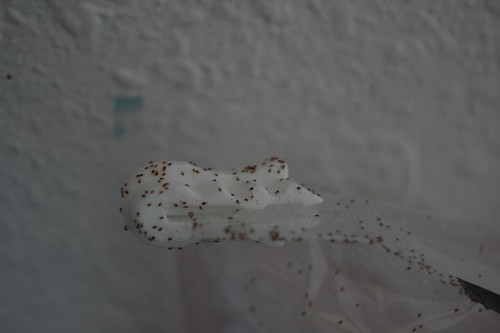
A few weeks ago, Annie noticed that a bird had built a nest in a vent on the side of our house. I'm not sure why someone put a vent on the side of the house, but it was now home to some baby birds. They sounded so cute and they made a perfect alarm clock every morning. That was all great until Annie walked into the little office room upstairs and found it crawling with hundreds of thousands of tiny little black bugs. 


It's hard to tell the size from this picture, but the thing they are crawling on is a small zipper on a plastic bag. 

We had to take all of our stuff from that room outside and every time we touched anything, they would start to swarm up our hands and arms. Annie got online and determined that they were Bird Mites, also known as Bird Lice. 

They were still coming in through the vent, so I went and removed the exterior vent cover and bird's nest while Annie cleaned the room out with water and vinegar. 


Fortunately, these things aren't hard to kill and they die or go away if they don't find a new host within a few days. We quarantined all of the items from that room outside for about a week just to be safe. 

The next surprise came when I started deconstructing the downstairs bathroom. 


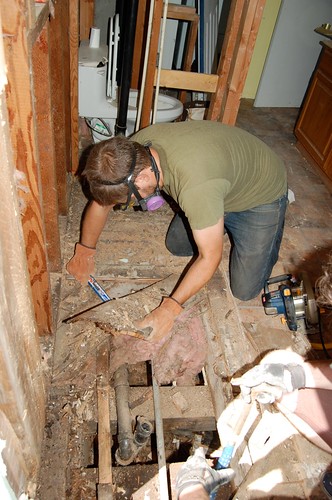
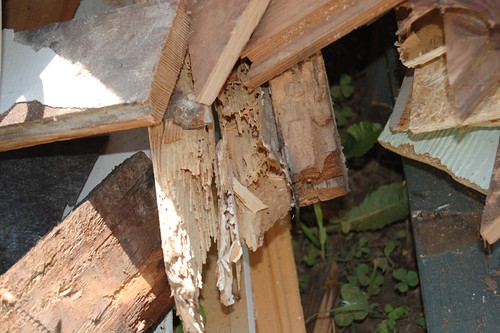
It looked like there had been a slow leak behind the shower for quite a few years. The floor was rotted out and a number of studs were completed rotted at the base and not even supporting the wall anymore. As I got to removing the damaged lumber, I noticed a fine dust coming out of some of the pieces. It was a lot like sawdust. I didn't think much of it at first, but as I took things apart more, it became more apparent that something was eating the wood. 


I called a pest control company out to look at it and it turned out to be Powder Post Beetles. They seem to have only eaten around the damp wood, which is common for them, but they have been known to eat entire houses. I'm glad we caught it when we did, but it's been a lot of work fixing the framing they destroyed. 


Chance looks through the giant hole we just cut in the house, trying to figure out the next step. 


Once the affected wood was all cut out, we started piecing the house back together. 


We had to cut the rotten / eaten subfloor back a few feet and replace some joist sections.

Finally, we were able to get back to doing what we had set out to do a few days earlier. We opened up the the wall between the kitchen and bathroom and put a support beam across it. The new wall will go back about three feet into the bathroom and the extra kitchen space will house the refrigerator and give us some extra storage. 


First post in!


Deconstruction doesn't mean you don't still get to use a sledgehammer from time to time.


Finally! Now just two more beams left to do...

So the pests are all dealt with and remodeling is back on track. I'm just now finalizing the plans in Sketchup and I'll post them soon. 
Friday, June 11, 2010

The First Trips

After buying the house, we were able to come home from Texas twice to see it and do a little bit of work. First order of business was in October, tearing out the disgusting carpets.


Annie enjoying the color scheme and urine stains in our new home.


Before crawling around underneath the house, this was the worst part.


Technically, child labor is sustainable, right?


This hardwood floor will be beautiful again one day!


Oh the things a vacuum can't extract from below a carpet. 


The rest of the rooms just had plywood underneath. 


Off to the recycler. Good riddance! 

We decided to take up the vinyl floor in the kitchen to see what was underneath it. Turns out to be an old linoleum floor and then more of the original wood. After verifying that there was no asbestos involved, we started trying to chip it all up. 


This is about how far we got before throwing a carpet over it. We thought we'd have a floor refinisher look at it first and tell us if they can still salvage the wood. 


We moved all of our stuff home from Austin and lived in the house from the end of November until the first week of January, when we went back to Texas again for about five more months. This time around, we just made the house livable so our stay wasn't too uncomfortable. 


We primed all of the upstairs floors so we could move our stuff up there while we worked on the first floor.


The living room floor right after being mopped. I can't wait to see it refinished. 


I took the kitchen cabinets out and moved them to the downstairs bedroom. This is my temporary tool room. 


This was our stove and we ate a lot of quesadillas that month. 


Until we can get our ductwork and air handler installed, this is our HVAC system. This old furnace is in the corner of the house. I must have increased it's efficiency ten fold by installing the cutting edge air flow system above it. 


The upstairs shower had a slow drip while the house was vacant and the drain had a slight leak. This made for a moldy mess around the downstairs toilet. I invested in a good respirator from Sanderson Safety Supply and removed the wet and moldy drywall and insulation. Then I replaced the leaking drain up above. I'm starting to get more comfortable with plumbing, but I'd rather someone else did it. 
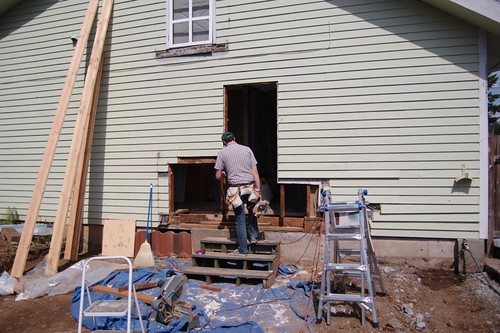
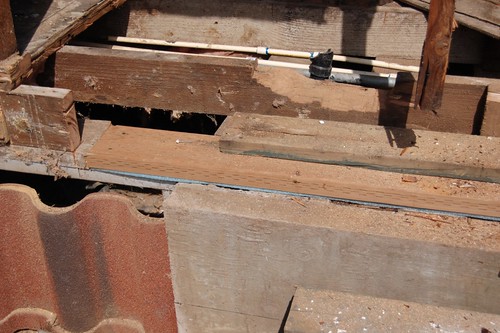


I decided that I hadn't been tortured enough and that I had better plot out the foundation. I barely managed to wriggle around underneath the house with a flashlight, tape measure, pen, and paper. I lost the first tape measure that I took down there and I'm convinced it was carried off by rats. 

After taking care of the floors and the bathroom, we decided to relax and spend time with our friends and family since we'd be leaving again before too long. 


Annie has always wanted a Weimaraner. I found Sadie, who needed a Foster home, and we took care of her for a few weeks. 


Really glad we got to see some snow at our new place. 


That was the last time we were home until June 7th, 2010, which pretty much brings us up to date. We haven't done a whole lot since we got home, but I'll post something soon.